Every woman desires to have long and beautiful nails because nail manicures look great on such nails. However, not everyone has them. If you have short nails, it is advisable to wear acrylic nail extensions and look as graceful as your long-nailed friends. This article discusses how to get a beautiful acrylic nail dip manicure at home.
We shall divide the acrylic nail manicure procedure into four parts to make it convenient for everyone to understand.
The Four-Step Acrylic Nail Manicure
Buy your acrylic supplies and keep them handy
Purchasing a good-quality acrylic nail kit is crucial for the manicure. However, if it is your first experience with acrylic nails, you should be extra careful and ensure that your acrylic nail kit does not contain MMA (Methyl Methacrylate). MMA is banned in many countries globally because it is not suitable for your nails.
The best way to purchase nail kits is to buy each item separately. Nail kits often include many things you might never use in your manicure. Is it not a waste of money? On the other hand, you can purchase your items individually.
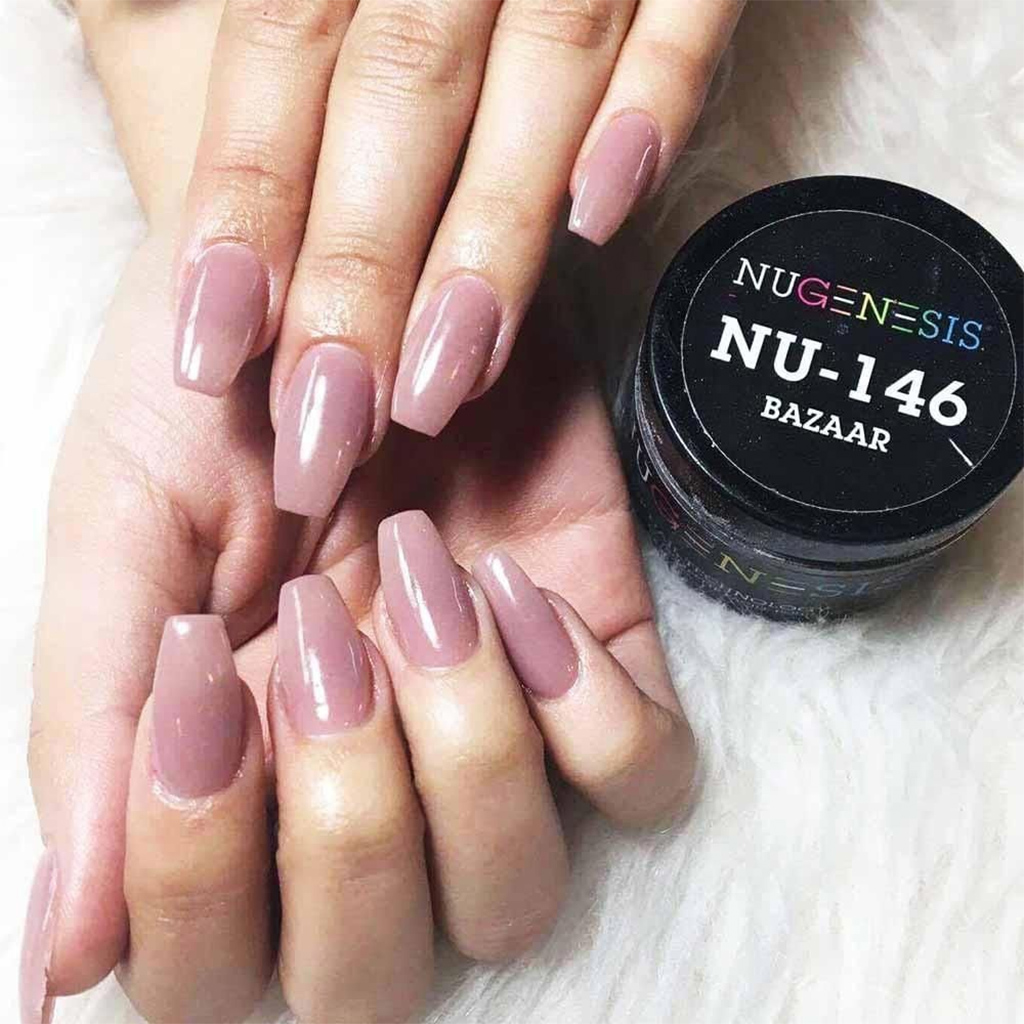
You will need acrylic nail tips, nail glue, clippers, files, acrylic liquid, nail acrylic powder colors, bowls, brushes, etc. Purchasing your kit items individually saves you money.
Prepare your nails for the acrylic dip manicure
Prepping your nails for the acrylic manicure is the same as any other manicure. First, you remove residual nail polish from your nails using acetone. It is better to use the soak method rather than filing the polish layers away. Peeling nail polish off your nails can harm them.
Use a sanitized nail clipper to trim the nails and bring them to shape. The nail file helps to smooth out the edges. The trick is not to cut your entire nails. Instead, it is better to leave a few millimeters of nails extending out of your fingers. It allows you to glue the acrylic tips with ease.
The nail buff helps you to rough the nail surface and makes it convenient for the acrylic nail tip to stick to it. Next, take care of your cuticles by pushing them gently into their grooves. An orangewood cuticle pusher is the best because it is soft and does not injure your nails or cuticles. Next, you can massage the cuticles with cuticle oil and push them in.
Apply the nail primer on your nails to remove residual moisture and oils from the nails. You can use a cotton swab or a lint-free cloth to rub the nail surface. Please note that the nail primer contains methacrylic acid. Hence, it can cause a mild burning sensation.
The acrylic nail procedure
Before starting the procedure, you should find the right size tips for your nails. Then, you can trim the tips down and bring them to size if necessary. Next, apply a dab of nail glue on the inside of the tip and place it around halfway down your nail. Press it for about five seconds to let the glue dry. Repeat the procedure on all your nails.
Pour some acrylic liquid into the bowl and add nail acrylic powder colors in a separate dish. It is better to ensure a well-ventilated area because acrylic can emit strong fumes.
Dip a clean brush into the acrylic dish and remove the bubbles. Next, you can press the brush against the dish’s sides to remove excess liquid. The next step is to run the brush through the acrylic powder and form a moist ball at the brush tip.
Start applying the acrylic mixture to your nails. Flatten the acrylic ball and spread it smoothly from the bottom of your nail towards the edges. You can take a second ball and place it near the cuticles. Use the brush to make a smooth transition from your nail to the acrylic tip.
Repeat the same process on all ten fingernails. Allow the acrylic layer to dry. You can tap the other end of your brush on the nail tip to get a clicking sound. It indicates that the nail tip has dried sufficiently.
Give your nails a good finish
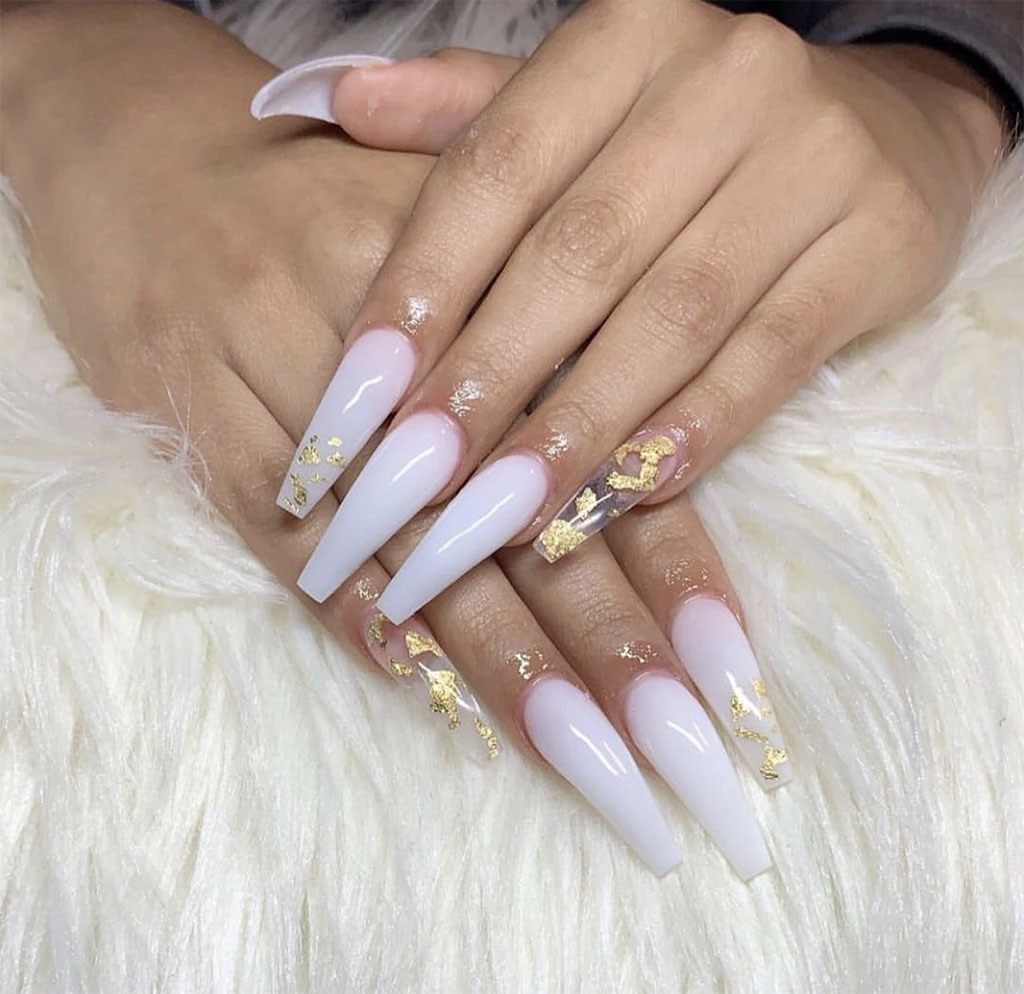
Your nail file can help shape the tips the way you want. You can paint your favorite nail powder acrylic on your nails and create a smooth surface. Finally, cure your acrylic nails under the UV lamp. Your manicure is ready to last comfortably for four to six weeks.
However, it would be fitting to take proper care of your nails and not do things that can damage your nails.
Final Thoughts
You can notice that the acrylic nail dip manicure is one of the easiest of all manicures. Anyone can master the technique with some practice. You can proudly show off your long nails to your friends and win their admiration.